Best and Easiest Cake Lollipop
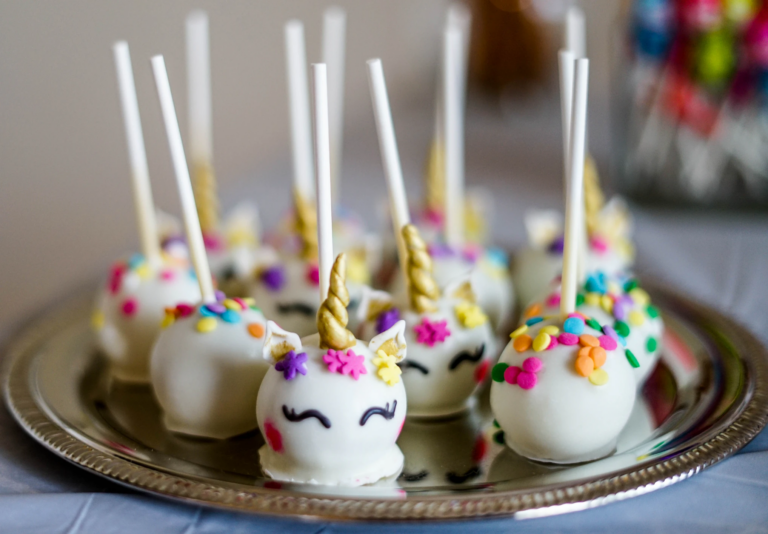
Cake lollipops, or cake pops, have become a trend over years and are here to stay. Not only are they super easy to eat, but they’re delicious, and there are so many ways you can change up and customize them. They’re also perfect for literally any occasion. From gender reveals, birthdays, to even weddings, cake pops are some of the best, quick, simple and convenient desserts you can make and eat.
But what are cake pops? If you have no idea what I’m talking about, the name might seem a bit confusing. But it’s quite literally a piece of cake on a stick, like a lollipop. It’s denser than a cupcake or cake, almost as dense as donut holes if you want to get specific, but still delectable and decadent.
That being said, if you’re in need of a quick dessert for your next gathering, or perhaps holiday party, try out this amazing recipe that breaks down how to make cake pops, from the ingredients, to host to cover it in icing.
But don’t be scared of that prep time, as it only takes 30ish minutes to get everything together, but you will need to chill the pops for over an hour to get the perfect consistency to start decorating!
RELATED: Chocolate Mud Cake
Ingredients
Instructions
STEP 1:
If you want to make homemade cake batter, then go for it! For this simple recipe, you can grab a package, around 15.25 ounces, or cake mix of your choosing, like Yellow Cake Mix. You’ll want to prepare the cake mix according to the package, which usually includes water, vegetable oil or butter and eggs.
STEP 2:
Pour your mixture into a 9-by-13-inch pan, and then let it cool completely.
STEP 3:
After it’s completely cooled, you’ll want to break the cake into pieces and place in a food processor. From here, add your preferred frosting and then process until the mixture forms a ball and pulls away from the sides of the bowl. This can take about 30 seconds. You can add more frosting, 1 tablespoon at a time, if it’s not coming together properly.
STEP 4:
Using a 3/4-ounce spoon, form the mixture into balls and put them on a baking sheet. You should come up with around 45 balls, but you can make them bigger or smaller depending on what you want. After they’re formed, refrigerate for 30 minutes.
STEP 5:
As your cake pops are cooling, you’ll want to start on your icing. Grab the wafers of your choosing and put them in a microwave safe bowl and melt according to the package. Dip the tip of the lollipop sticks into the icing and then stick it into the cake ball. Repeat for all cake lollipops. Then place them back in the fridge to chill for another hour.
STEP 6:
Now that they’ve chilled properly, remelt the chocolate and then dip each cake lollipop into the melted chocolate and let any excess run off. When decorating, lift the cake pop upright and then sprinkle the toppings on from above. Afterwards, you can either stick the sticks into the Styrofoam blocks or a cake pop stand, so they set properly upright, or just stick the cake on parchment paper, however, you won’t get the clean finish if you do this.
CHECK OUT: Delicious Coffee Cake
Customize
Customizing cake lollipops is just as easy as customizing and changing up cupcakes and cakes. You can do this with any cake flavor, with any icing, and with any topping. I personally enjoy red velvet games with a cream cheese frosting, and then topping it with some cocoa powder. A lot of people do this and add a bit of cream cheese filling inside the cake pop, which is a great way to enhance your pops.
If you’re wanting to do this as a gender reveal, you can dye your cake mix before baking, and then mix them accordingly. You can add chocolate chips, fruits, cookies, sprinkles, and any other items you might think would taste great in these. Your imagination can run wild with this recipe! Who knows, maybe you can even make brownie lollipops!
How to Store

Place you finished cake lollipops in a container lined with paper towels and store in the fridge for up to a week. You can also freeze your cake lollipops if you want, but it’s best to freeze then uncoated.
You can freeze them for up to six months, just make sure to thaw them before dipping them before eating or dipping in toppings.
Thinner Chocolate
One of the biggest struggles I have is when the chocolate is just stubborn. Dipping the pops is probably the most difficult part of making cake lollipops, especially on a day when I have very little patience. That being said, let’s see some ways that you can easily dip your chocolate with some added tricks if it’s being just too stubborn.
The first trick is to add 1 tablespoon of shortening to your package of wafers to melt. This helps thin it out, so it doesn’t stick so much to the cake.
There are other items that you can add as well for the perfect consistency, like canola oil, coconut oil and vegetable oil. You can also add a bit of butter. If you have larger portions of chocolate, try adding paramount crystals, which is not that common, but super useful if you regularly melt chocolate.


